How to record
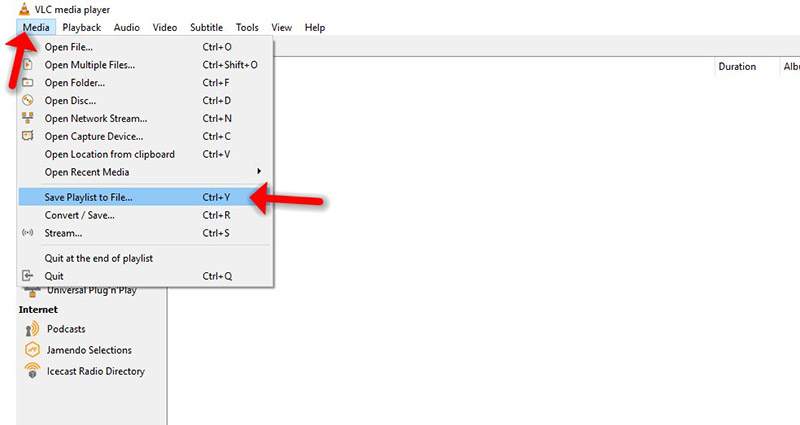
Step 1: To capture and record a video of your desktop to a file, click the Media menu in VLC and select Convert / Save.
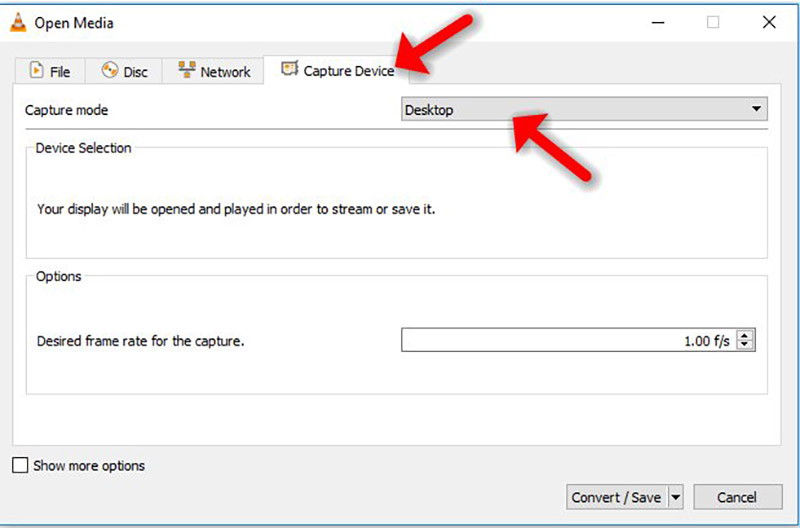
Step 2: Click the Capture Device tab and select Desktop from the Capture mode box.
Note: The default frame rate is one frame per second, which won’t appear very smooth. You’ll probably want to increase the frame rate. After you’re happy with the frame rate, click the Convert / Save button.
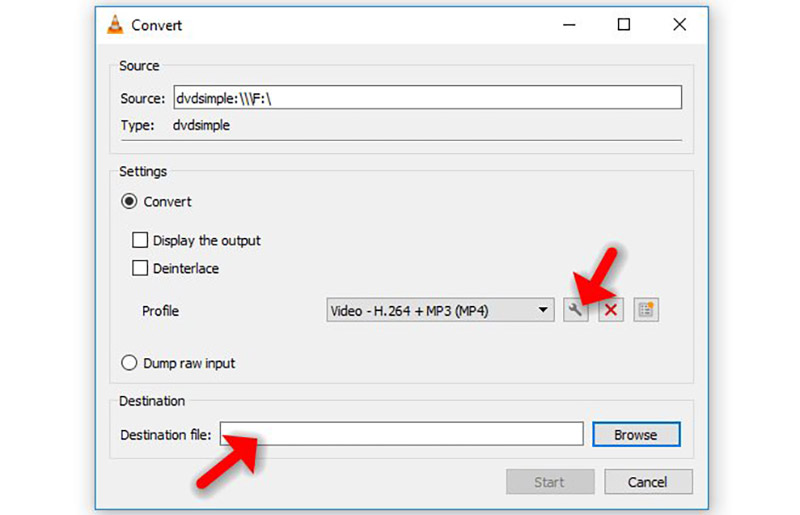
Step 3: Set a destination file in the Destination section. You can enable the Display the output checkbox to display the contents of your desktop in the VLC window while recording, but this isn’t necessary.
To adjust the resolution and video codec, click the edit button to the right of the Profile box.
You can also select a profile from the profile box and use it as-is, without editing it.

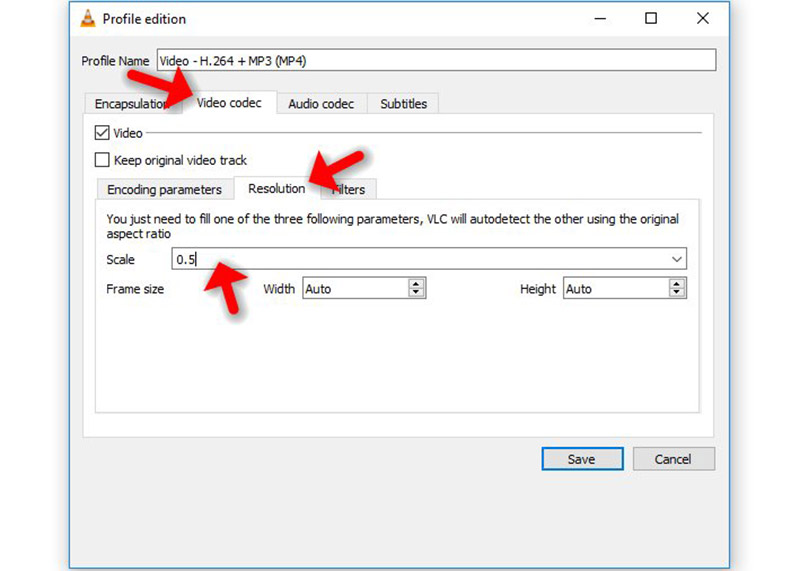
Step 4: Change the resolution by clicking over to the Video codec tab and using the options in the Resolution section. For example, you can use half your desktop's resolution by typing 0.5 into the Scale box.
Step 5: After specifying your options, click the Save button and click the Start button.
VLC will inform you that it’s “streaming” your desktop to a file. Use your computer normally and VLC will record your desktop. When you’re done, click the Stop button.
Open your saved file to view the video of your desktop. You can send this file to others, upload it to YouTube, or do whatever else you like with it.
Developed by Rapid IPTV

